Setup SSO with OKTA
This is step-by-step guide for configuring Spectral SSO with OKTA as your identity provider.
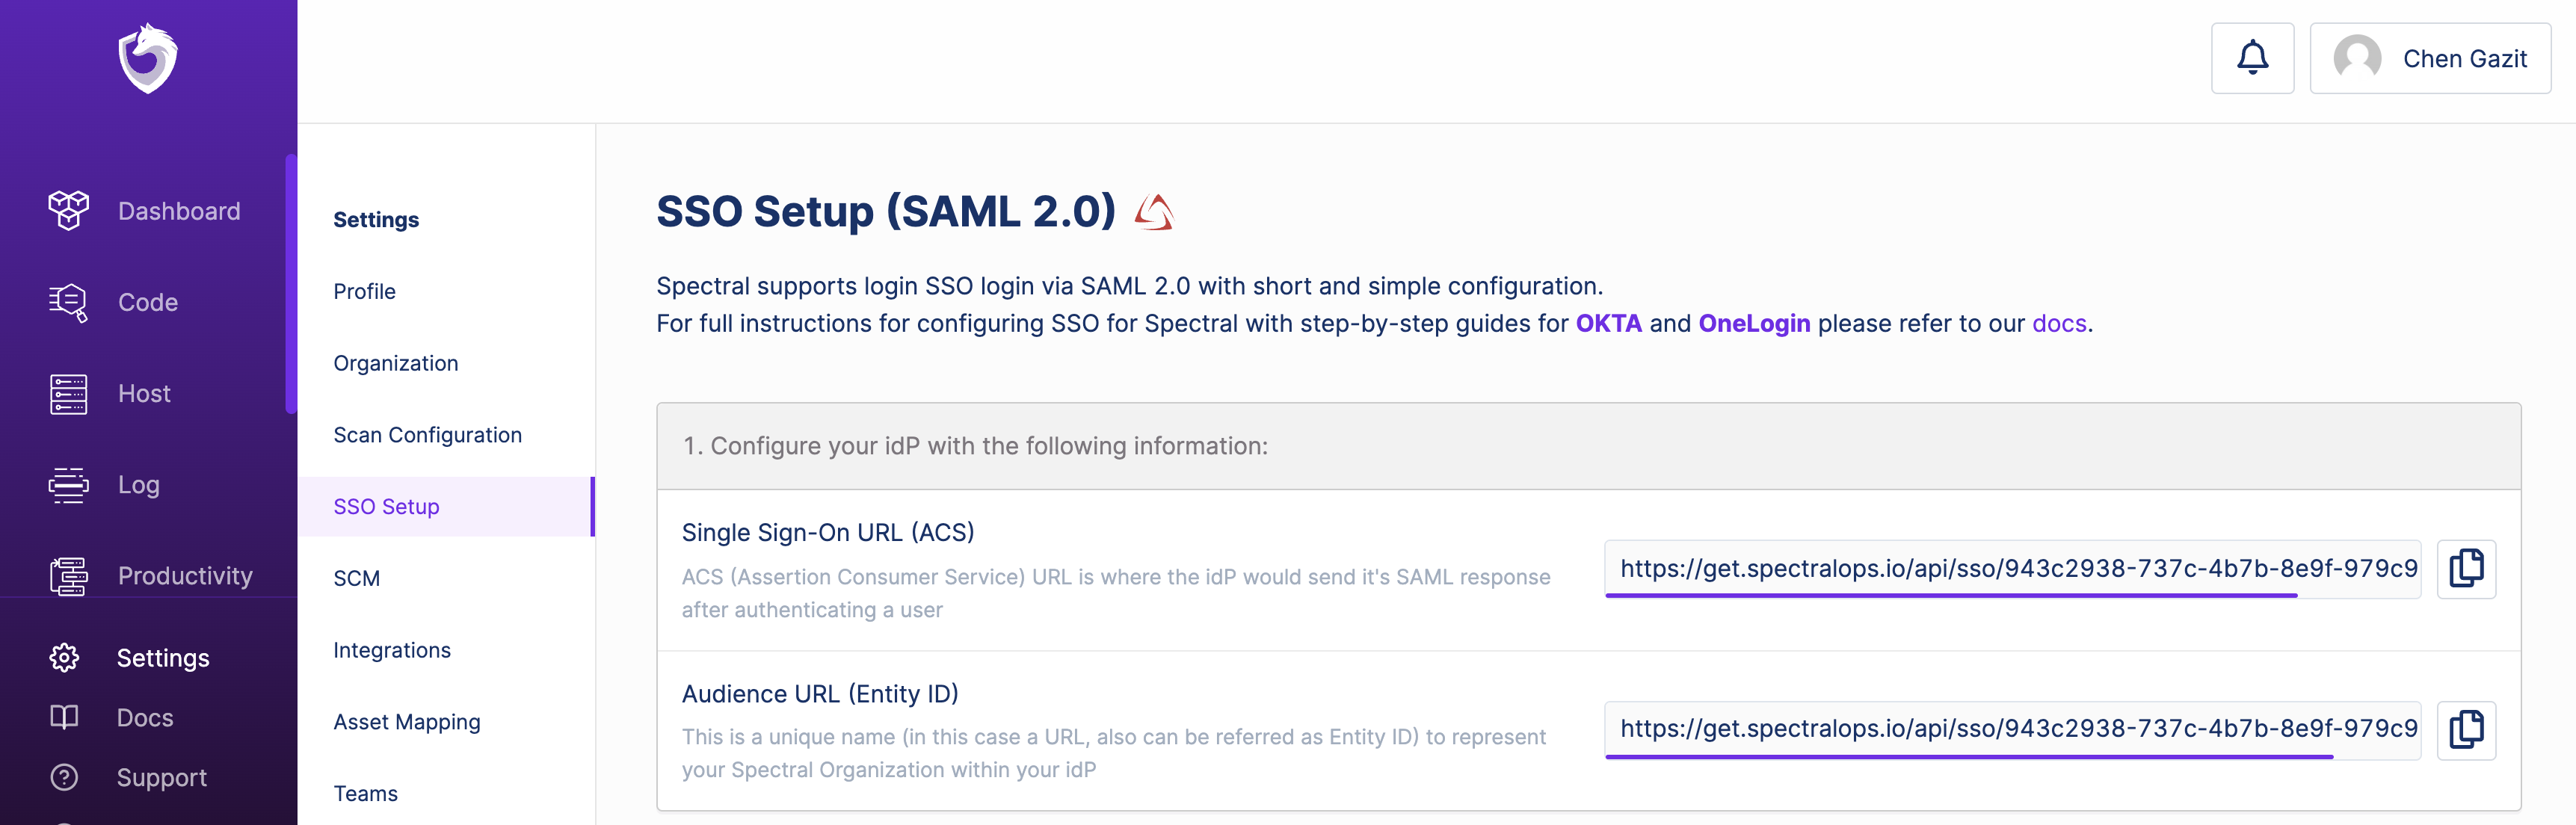
1. Grab Single Sign-On and Audience URLs from your Spectral account
In your account go to Settings, and then click on SSO Setup:
2. Create new SAML app integration in OKTA
Within your OKTA account, click on Applications, and then click "Create App Integration", then this modal would show up:
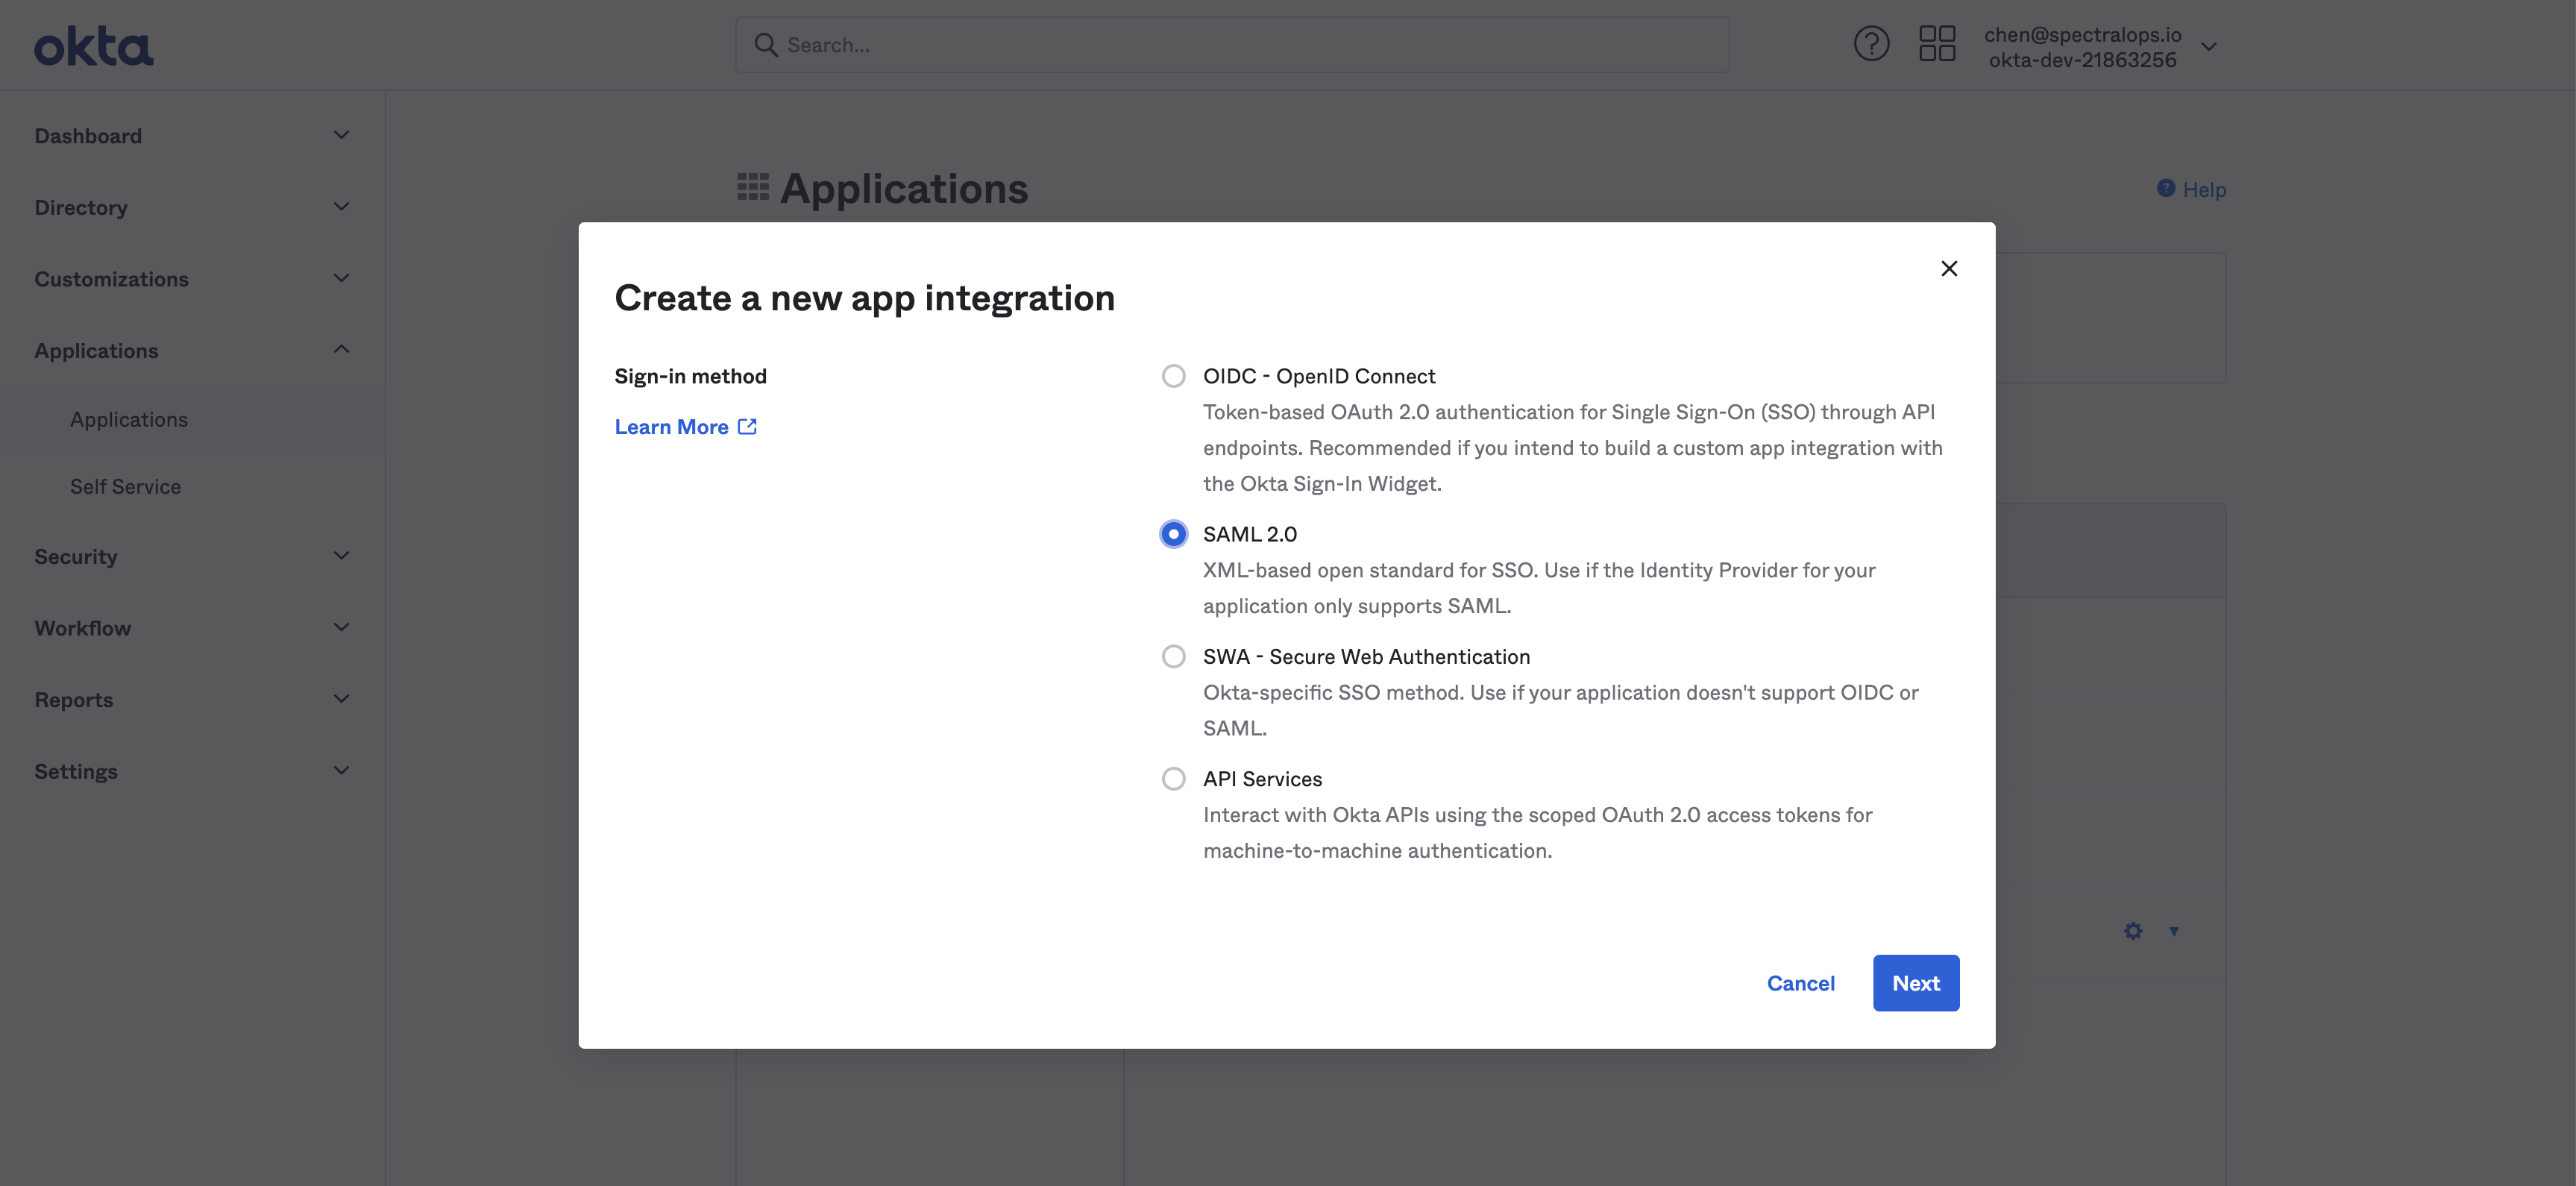
Select SAML 2.0 and click Next.
3. Name your application
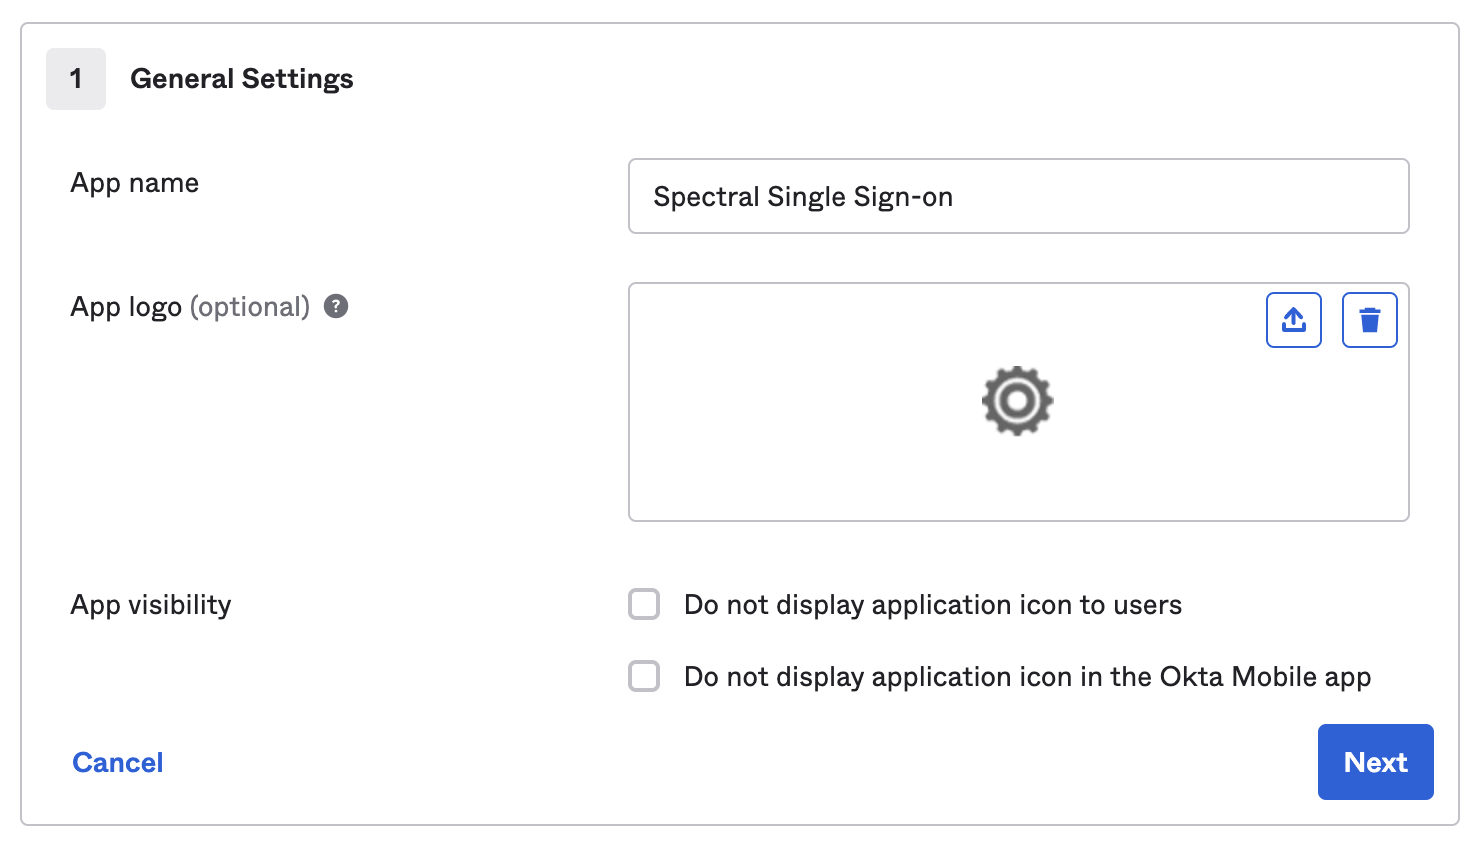
Give your application a meaningful name, and click Next.
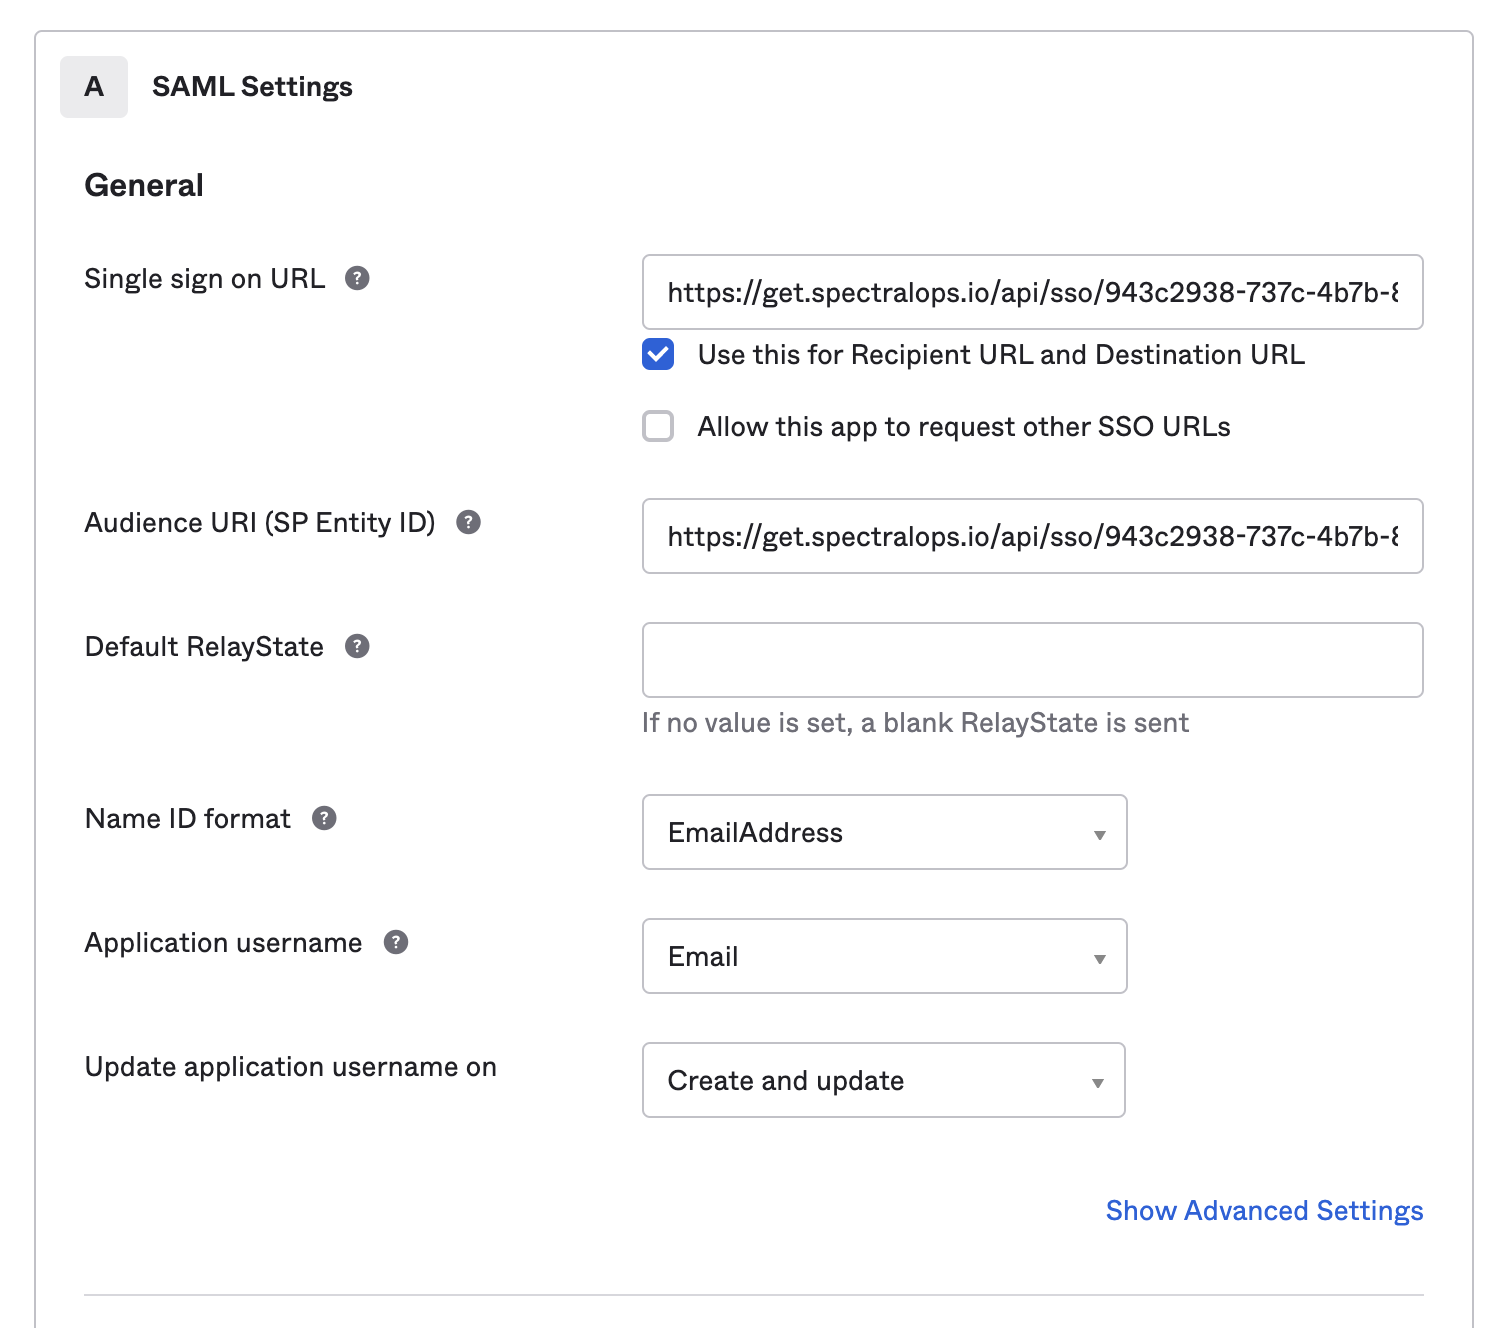
4. Configure SAML settings of your application
- Paste the Single Sign-On Url and the Audience Url you grabbed from your account in step 1.
- Leave Default RelayState blank.
- In Name ID Format field - Select EmailAddress.
- In Application Username field - Select Email.
5. Add attributes statements
Spectral requires the first and last name of the user to exist in the SAML assertion.
In order to accomplish that, please add firstName and lastName attributes to the Attributes Statement section.
firstName - should mapped to user.firstName.
lastName - should be mapped to user.lastName.
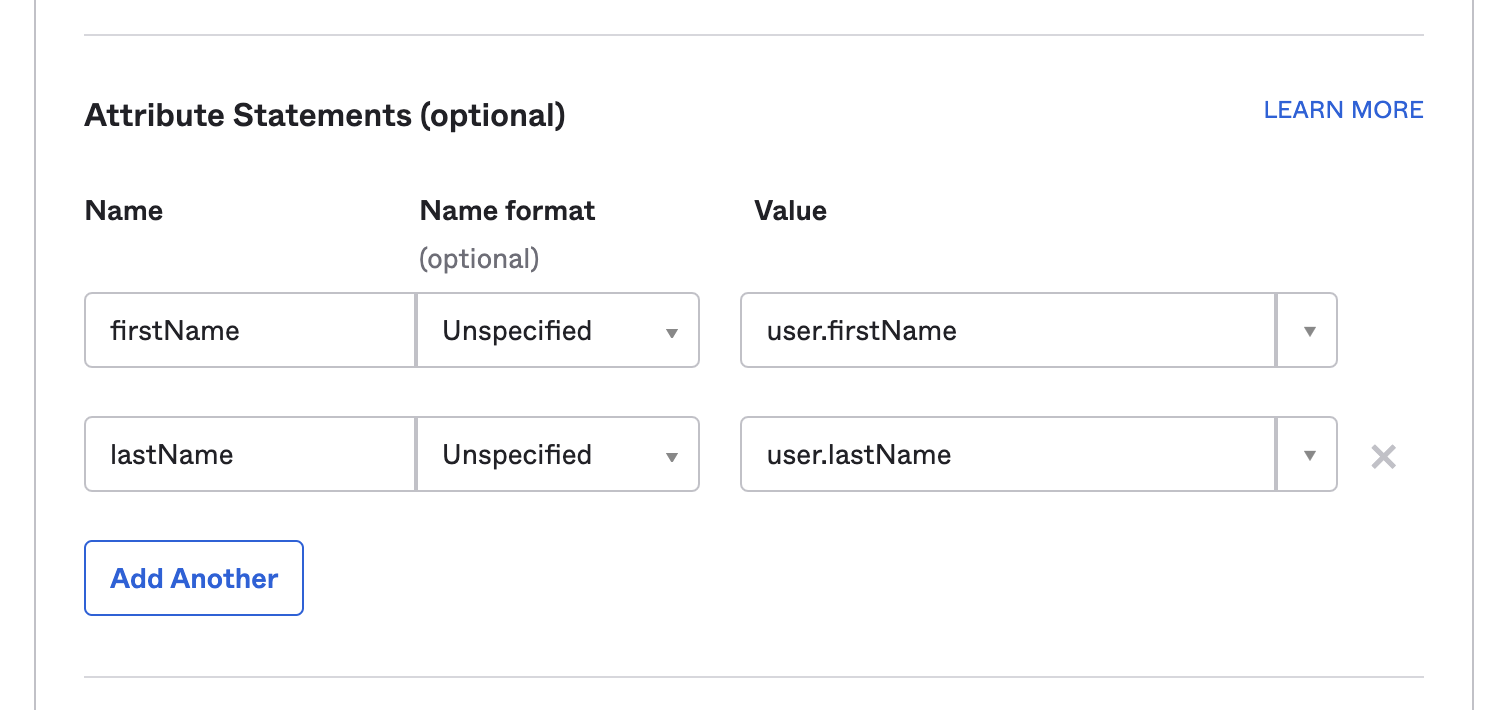
Then, click Next (the button would appear at the bottom of the form).
6. Configure feedback step

Then, click Finish.
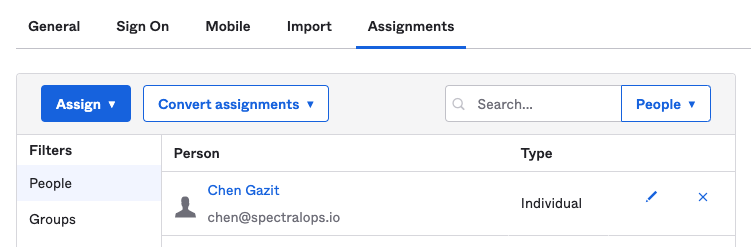
7. Assign your application
Assign your application to one of the people of your organization - required by OKTA in order for start using the application.
To do that, go to the Assignment tab, click on Assign, select Assign to People, and choose the person to assign the application to.
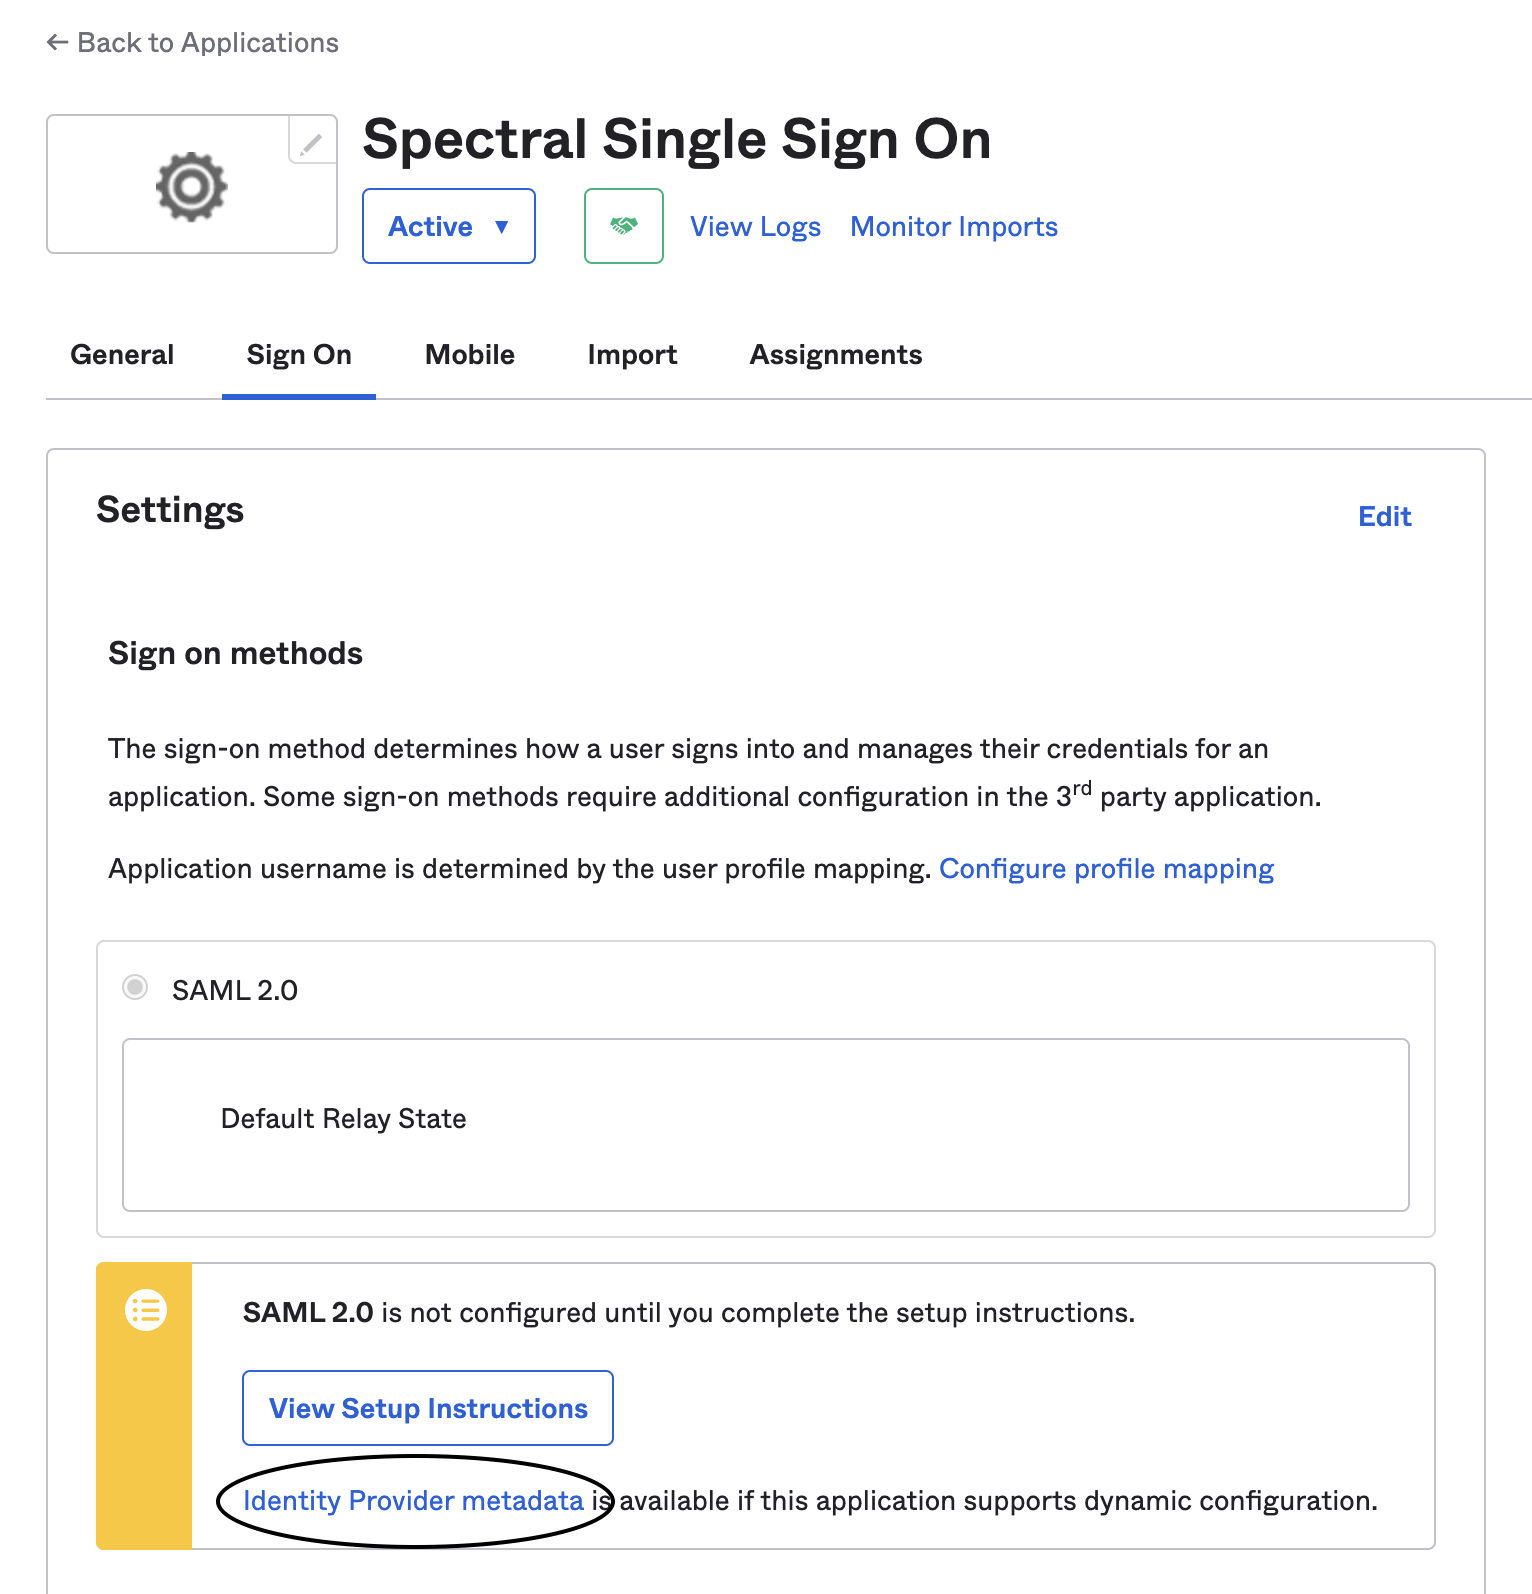
8. Get Identity Provider metadata from OKTA
In your application admin page in OKTA, under the Sign on tab, click on Identity Provider Metadata to view the metadata XML.
Save the metadata in a file on your machine, having .xml extension.
9. Provide Spectral Email domains of your organization and Identity Provider metadata
Go to your account in Spectral, and do the following:
- Insert the Email domains of your organization (Only users having an email address of those domains would be able to log in through SSO) in the Email domains of your organization field.
- Upload the
.xmlfile you created in step 7 in the Identity Provider metadata field.
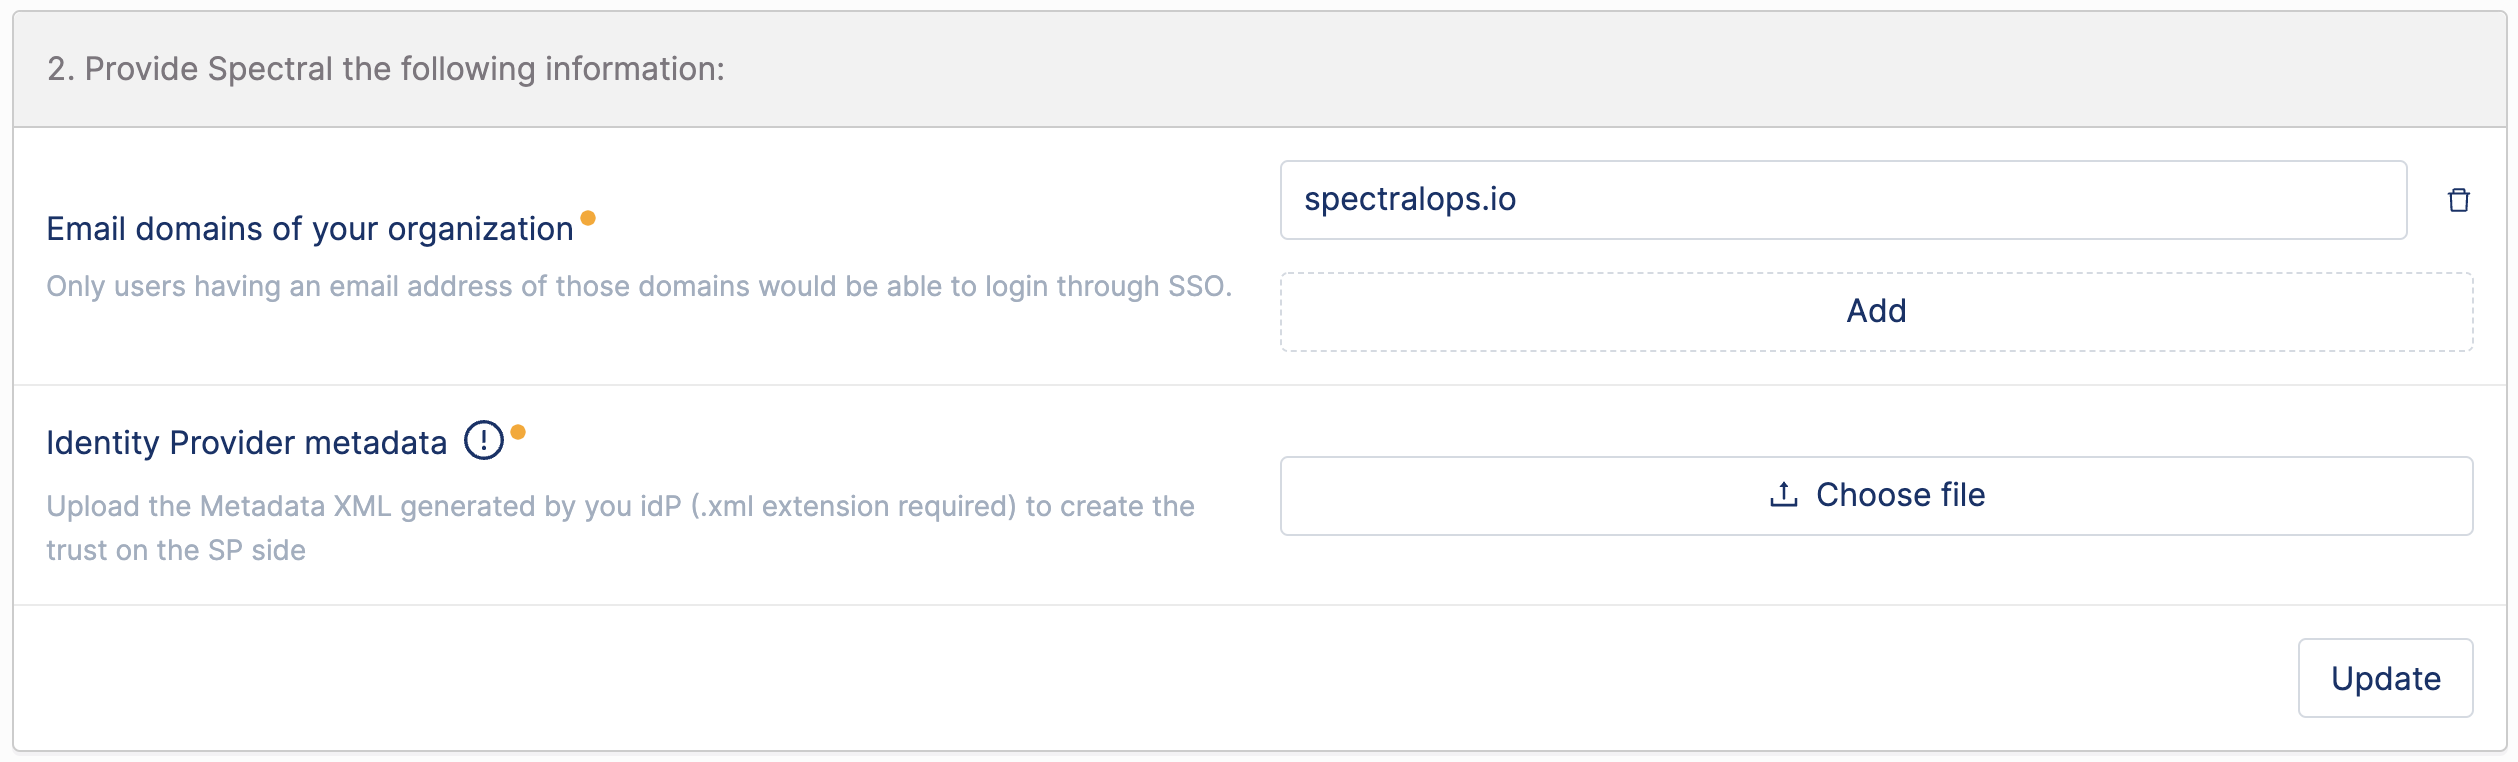
Then, click Update.
9. Share login URL with your team
You're all set!
After providing the required data for Spectral in step 8, you will see at bottom of the page the URL that will be used by your team to log in to Spectral via SSO.

All left to do is share this URL with your team :)
Updated 11 months ago