Custom Rules
Supported Spectral versionsPlease note that centralized custom rules are supported in Spectral version
1.9.131and above.
Activation Required
Please note that before using centralized custom rules, the account owner / an admin must activate the feature in SpectralOps.
Steps for activation:
- Navigate to Settings > Custom Rules
- A confirmation popup will appear.
- Click on "Activate".
Besides creating custom rules locally for a specific repository, Spectral supports creating custom rules at the organization level. This allows security professionals to propagate custom rules to their organization (side by side with local scan configuration).
How to create a custom rules version?
Step 1 - Init
To begin working with custom rules you need to create the file structure required by Spectral, the init command does that for you.
Run init command in your CLI:
$HOME/.spectral/spectral custom-rules initSpectral will create a folder named .spectral in your current location. You'll find an example rule file in .spectral/rules to help you get started.
Step 2 - Create your rules
Before writing new rules, we recommend syncing the custom rules of your organization by running the get command:
$HOME/.spectral/spectral custom-rules getYou can create a file per rule or a few rules in a single file, all the files should be named in the format of custom_rule_*.yaml (spectral would publish rules from those files only). Other files in this folder are repo-specific rules and won't be published.
Click here to read our guide for writing detectors.
Custom playbooks
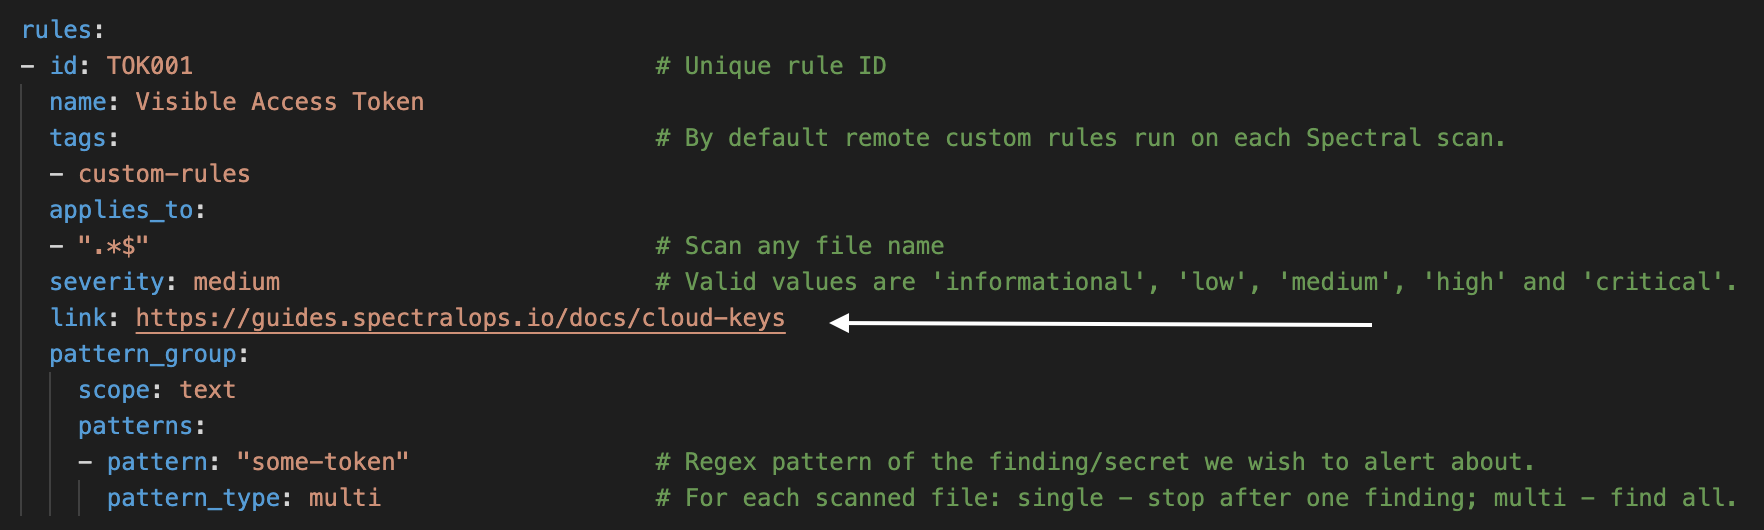
In centralized custom rules, Spectral allows to add your own link to the playbook of your detector.
To do that, simply add a link property to your rule.
carefully check your rulesPlease make sure your rules do not expose sensitive data by targeting a secret directly or by targeting a secret by an obvious regex. You can run those locally in your environment, but we don't recommend persisting those.
Step 3 - Publish
🦸♀️ Finished writing your rules? Great job! You are almost done, now all that's left is validation and publish.
Run the publish command:
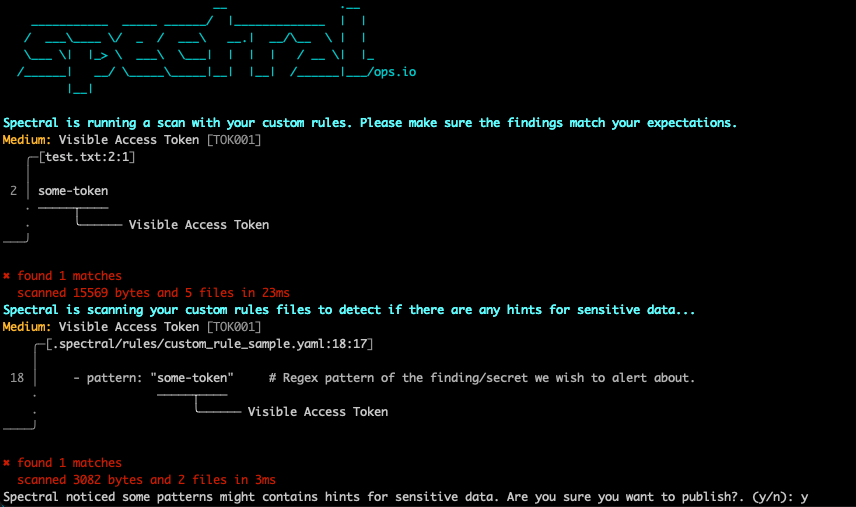
$HOME/.spectral/spectral custom-rules publishBy default, before publishing, Spectral does two scans.
- A scan on the current folder using only your custom rules. Explore the findings of this scan to make sure your rules are working as expected.
- A scan of your custom rules themselves to identify sensitive data exposures.
If Spectral detects any issues in your custom rules scan, you'll be notified and would be able to cancel your publish process:
Once you approved, a new version will be created. This version must be reviewed and approved to become active.
You can disable those validations by running the publish command with the --no-scan flag:
$HOME/.spectral/spectral custom-rules publish --no-scanStep 4 - Review
The version you published in step 3 is still not in use yet.
To make your version official and apply it to your entire organization scans - it has to be reviewed & approved by an admin or the owner of your Spectral account.
The review can be done in SpectralOps->settings->custom rules.
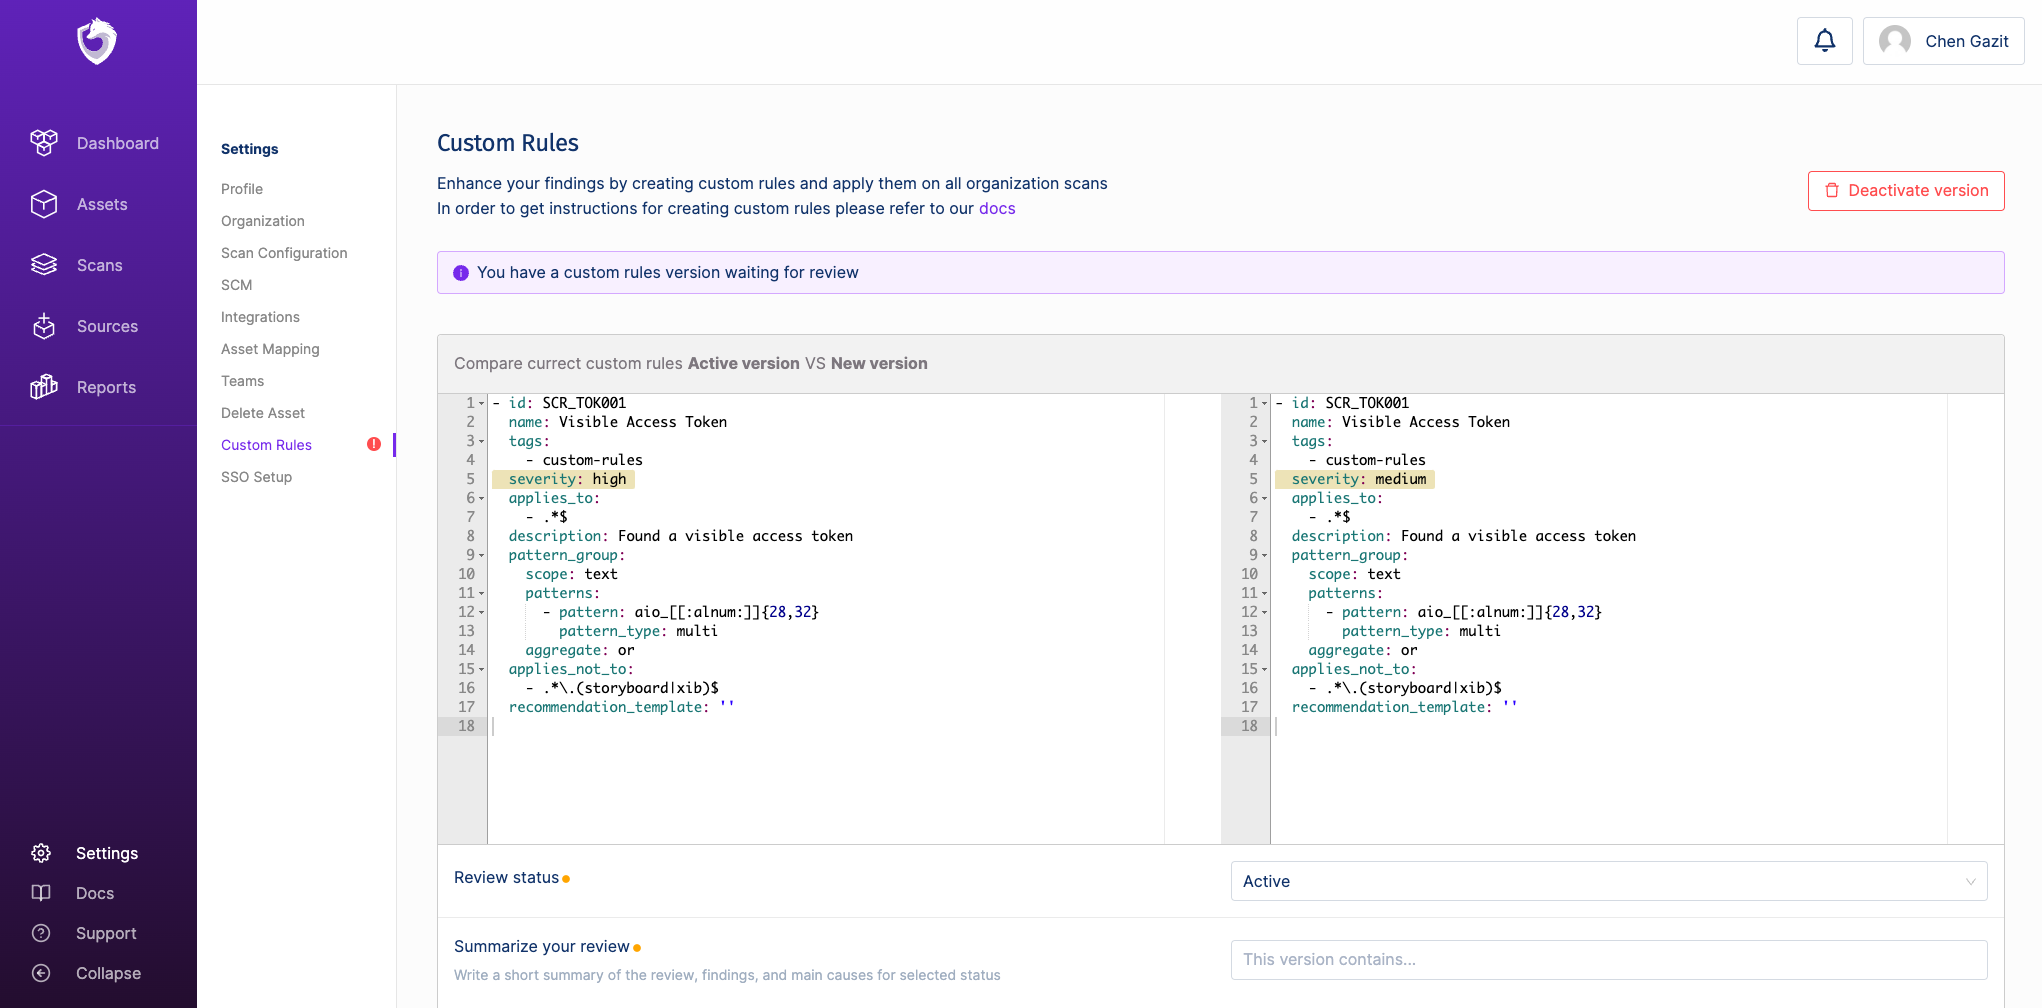
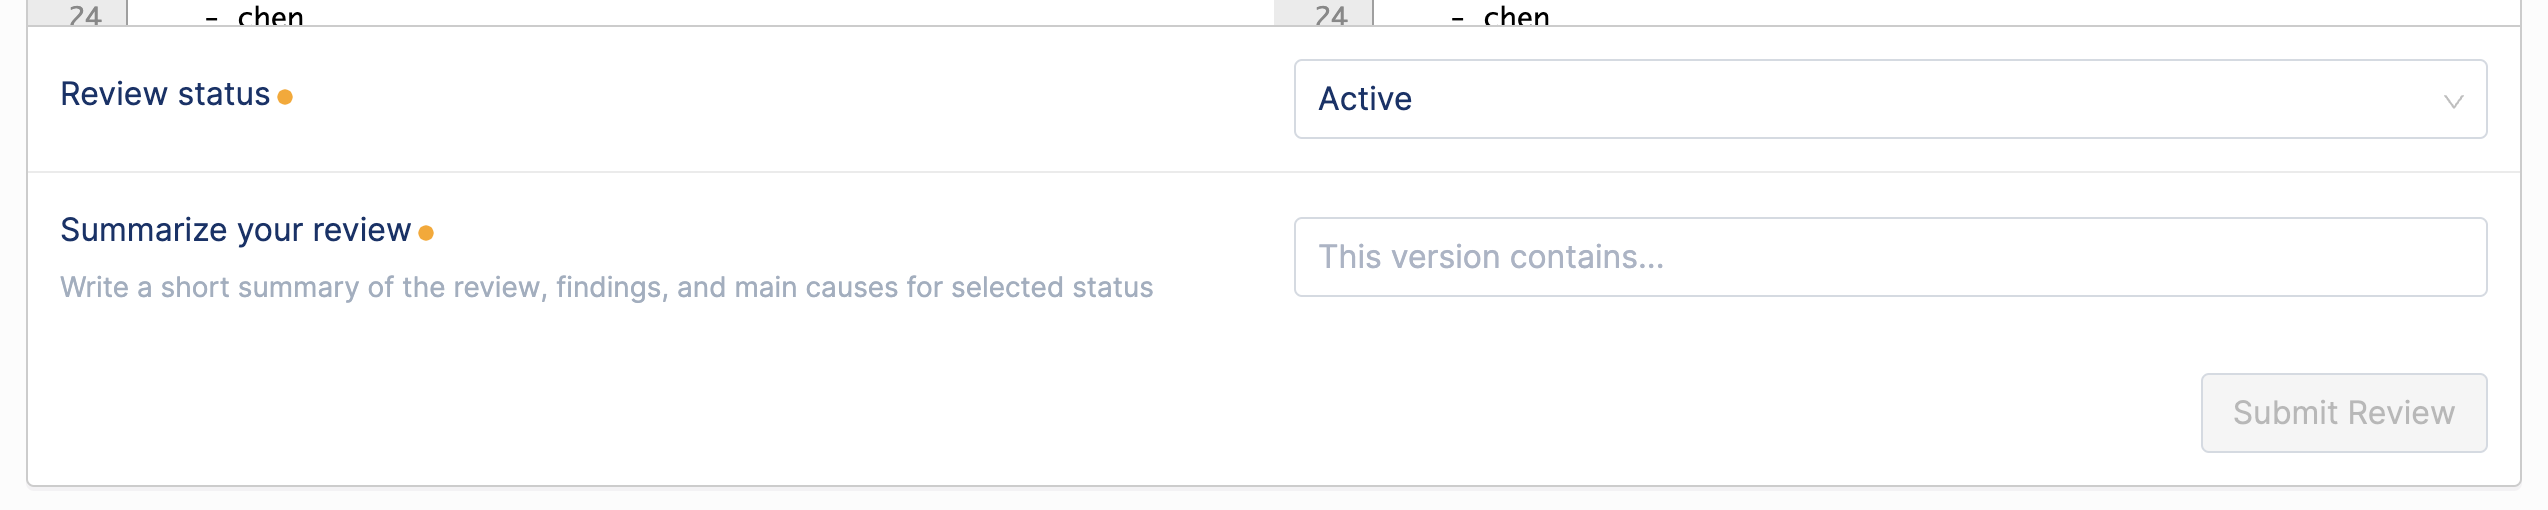
The reviewer can approve or reject the new version and summarize the review in a short comment. Please write a descriptive comment that would help you to identify this version in the future.
If the reviewer accepts the changes the new version will become the newly active version instead of the old one.
If the reviewer rejects the changes the currently active version remains in place as active.
Step 5 - Use your rules!
That's it, your new rules are now applied to your entire organization scans.
Custom rules are included by default
Published custom rules automatically gets the custom-rules tag, and Spectral scanner automatically includes the custom-rules tag.
Exclude custom rules
To exclude custom-rules in your scans, use the exclude-tags parameter with the custom-rules tag:
$HOME/.spectral/spectral scan --exclude-tags custom-rulesUpdated 11 months ago